Wednesday, October 12, 2016

Pumpkin Meatballs With Cinnamon Pumpkin Sage Pasta Sauce


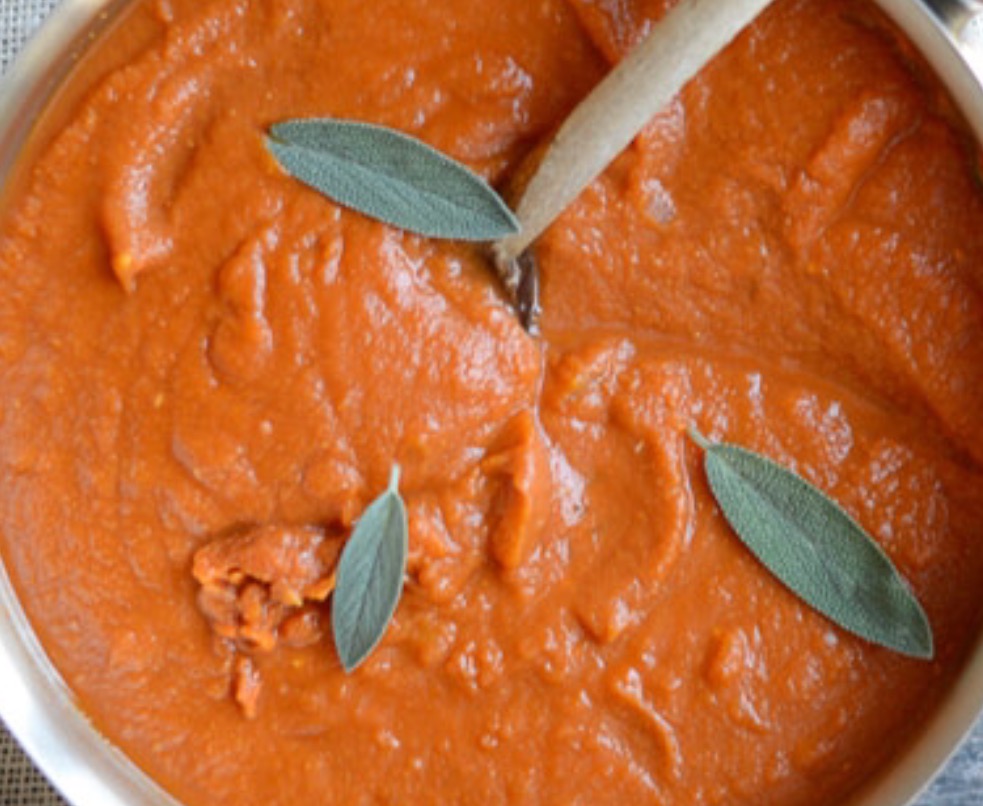
These yummy pumpkin cinnamon meatballs in pumpkin sage marinara sauce is on a bed of spaghetti squash. These meatballs have ground turkey, pumpkin, fresh sage, cinnamon and more warm spices. These are full of fiber and so healthy for you, the sauce you just get the little hint of pumpkin, it makes you say, hmm what is that, this meal will fill your home with all the flavor of fall, this screams fall, I love to bake with pumpkin and apples this time of year, anything pumpkin I will try. Give this recipe a try you will love it. is only 250 calories, that's 4 meatballs a big plate squash, and parm sprinkled all over the top.


So I love the show The Kitchen, they had a nutritionist on one day and she made this recipe and I said I have to make this asap, first of all pumpkin you all know is my favorite, and after I watches and heard all of the ingredients I knew we would love love this, and we sure did. I was hesitant to let my family know I am making pumpkin meatballs in pumpkin sauce, so I didn't say anything, so it looked just like pasta with meatballs, they all dove in eating it thinking that..I watched them and they said wow this is good but doesn't taste like your meatballs it's delicious. If you have a plate of pasta with 4 meatballs it is 2,500 calories, this is 250 calories, omg and it's so good.


Ingredients For The Meatballs:

1 1/3 pounds lean ground turkey
1 cup canned pumpkin purée
1 1/2 Tablespoons fresh sage
1 1/2 teaspoons Cinnamon
1 Tablespoon brown sugar
1/2 teaspoon Salt

1/2 teaspoon Pepper
1/4 teaspoon nutmeg
1/4 teaspoon ginger
1/4 teaspoon garlic powder
1 egg

Parmesan Cheese for Topping at time of serving

Ingredients For The Sauce:

3 cups chicken broth
1 (15 ounce) can pumpkin purée
28 ounce tomato or marinara sauce, homemade or canned
2 teaspoons dried basil
1 teaspoon dried garlic
1 teaspoon cinnamon
6 sage leaves
1 teaspoon salt
1/2 teaspoon pepper
1/4-1 teaspoon red pepper flakes, if desired

For The Pasta:
1 large spaghetti squash, (for a low fat alternative), if desired you can use pasta but the calorie count will go up.


Directions For The Meatballs:

1. In a large mixing bowl add the turkey, then just add all the other ingredients and stir until combined. Place a piece of Saran Wrap over bowl and place in the refrigerator for 30-60 minutes to make them easier to roll. You will get 20-22 meatballs.
2. After they come out of refrigerator roll meatballs and place on a cookie sheet, place a piece of parchment on cookie sheet first. Bake 15 minutes, turn meatballs and cook another 10-15 more minutes until browned
3. Place in the sauce and let the meatballs absorb all the sauce, keep in the sauce for about 30 min on simmer. Then add over your spaghetti squash pasta. Sprinkle with Parmesan cheese and enjoy


Directions For The Sauce:

1. In a large stockpot add the sauce, broth, pumpkin, basil, garlic, cinnamon, sage, salt, pepper and red pepper flakes( if desired). Bring the sauce to a boil, then reduce the heat to low and simmer 20-25 minutes


Directions For The Spaghetti Squash:

1. To soften the squash because it is hard to cut through, place in the microwave for 4 minutes
2. Take it out the cut the ends off, and cut down the center, with a spoon take the guts and seeds out.
3. In a dish place 1/2- 2 inches of water on the bottom, then place the flesh side down into the dish and cook each half in the microwave for about 15 minutes or until the flesh is softer and ready, then with a fork scrape the squash until you get spaghetti strands, should look just like pasta. Sprinkle with some salt and pepper

Assemble:

In a large bowl or plate lay the spaghetti squash on the bottom, then add some meatballs and sauce, sprinkle with some Parmesan cheese and enjoy


Recipe from: http://www.foodnetwork.com/recipes/pumpkin-meatballs-with-cinnamon-sage-tomato-sauce.html


Monday, October 10, 2016

Mummy Mason Jar Luminaries


These mason jar mummy's are so darn cute with only 4 items you can make these in less then 5 minutes, these are great decorations for kids to make, place them on your candle holders for display and everyone will love making and looking at them. All of the items used can be purchased at your local craft store and dollar store, it's a great cheap decoration. I was making them laughing and saying omg how cute and easy are these.

Your Items Needed:

Package of googly eyes
3 mason jars, any size ( I used large)
Gauze tape 1" size
Flame less candles
You can use a glue gun to secure the ends

Directions:

Just wrap the jars in gauze tape
Glue the eyes on
Place the candles in
That's All!!!

Individual Apple Crisps


This apple crisp is so amazing, with very few ingredients the sweet apples, cinnamon, sugar, and the topping is the best part of recipe. It is buttery, with a little crunch just perfect. You can get 5 individual Apple crisps with this recipe,and believe me try it. You will be making this once a week it is that easy.

I love the fall the smell of apples, pumpkin, cinnamon in the air while baking and cooking. Those are the 3 ingredients I love to use. I have a recipe for an apple crisp which is to die for, so I switches things up a bit and made this recipe to fit in these cute little ramekins, by the way I love The Pioneer Woman's collection. You can find in Walmart or online.


Ingredients:
For The Apples,
3 Large Gala apples, peeled, cored, sliced on the thin side
3 1/2 Tablespoons sugar
1/2 Tablespoon cinnamon
2 Tablespooons flour
Lemon
For The Topping:
1/2 cup flour
1/2 cup sugar
1/2 Tablespoon baking powder
1/2 egg, what I did was whisked 1 egg and poured half into the topping mixture
1/2 stick butter, melted
Directions:


1. Preheat oven to 350 degrees and spray 4-5, (I used 5) ramekins with cooking spray then set aside, for the topping in a medium bowl combine the flour, sugar, baking powder, and the egg. Set the topping aside
2. In another medium bowl add the cut apples, coat with 2 Tablespoons fresh lemon juice, then in a small bowl add the sugar and cinnamon and stir together, then pour into the bowl and coat the apples with the cinnamon/sugar mixture then sprinkle the 2 Tablespoons flour and toss the apples to coat.
3. Distribute the apples evenly into the ramekins then evenly place the topping on each
4. Melt the butter in the microwave, then with a spoon drizzle the butter over the topping, do with each ramekin until using all of the butter
5. Bake for 30-35 minutes until the topping gets light to golden brown
6. You can enjoy these warm or room temperature


Individual Apple Crisps


This apple crisp is so amazing, with very few ingredients the sweet apples, cinnamon, sugar, and the topping is the best part of recipe. It is buttery, with a little crunch just perfect. You can get 5 individual Apple crisps with this recipe,and believe me try it. You will be making this once a week it is that easy.

I love the fall the smell of apples, pumpkin, cinnamon in the air while baking and cooking. Those are the 3 ingredients I love to use. I have a recipe for an apple crisp which is to die for, so I switches things up a bit and made this recipe to fit in these cute little ramekins, by the way I love The Pioneer Woman's collection. You can find in Walmart or online.


Ingredients:
For The Apples,
3 Large Gala apples, peeled, cored, sliced on the thin side
3 1/2 Tablespoons sugar
1/2 Tablespoon cinnamon
2 Tablespooons flour
Lemon
For The Topping:
1/2 cup flour
1/2 cup sugar
1/2 Tablespoon baking powder
1/2 egg, what I did was whisked 1 egg and poured half into the topping mixture
1/2 stick butter, melted
Directions:


1. Preheat oven to 350 degrees and spray ramekins with cooking spray then set aside, for the topping in a medium bowl combine the flour, sugar, baking powder, and the egg. Set the topping aside
2. In another medium bowl add the cut apples, coat with 2 Tablespoons fresh lemon juice, then in a small bowl add the sugar and cinnamon and stir together, then pour into the bowl and coat the apples with the cinnamon/sugar mixture then sprinkle the 2 Tablespoons flour and toss the apples to coat.
3. Distribute the apples evenly into the ramekins then evenly place the topping on each
4. Melt the butter in the microwave, then with a spoon drizzle the butter over the topping, do with each ramekin until using all of the butter
5. Bake for 30-35 minutes until the topping gets light to golden brown
6. You can enjoy these warm or room temperature


Tuesday, August 2, 2016

Propagating Your Herbs From Clippings


Starting a new herb garden is an addition to adding flavor, spice and color to your garden, now that you have an established herb garden outdoors in the spring and summer you can start taking clippings from some herbs. Here are a list of 8 herbs you can propagate:

Basil
Thyme
Lavender
Rosemary
Spearmint
Sweet mint, any variety of mint
Cilantro
Oregano


Just think no more going to the store in the winter months for your fresh herbs, you can pick them right in your home now. You can keep them for many years, during summer you can place them back outside or keep them where they are in your home. I literally have 10 pots of basil, loads of mint, Rosemary, thyme and Lavender. I am so glad I looked into this I will not have to buy herbs for years if all goes well, I am so excited with all these herbs, just filling the house with all of these wonderful herb scents and saving so much money. I went to my local craft store and purchased pots and the bottoms, you can paint them to match your decor. I can't wait to place Rosemary and lavender in every room in my house, plus the great part about this, if you own chickens these herbs will prevent mosquitos in there coop, it's a win win situation all the way around. Enjoy!!!!


No need to go back to the garden center where you purchased your first plants. This step is called propagation.

What Is Propagation?

Propagation is creating new plants from a variety of sources: seeds, cuttings, bulbs, and other plant parts. There are 3 main methods of herb propagation: seeds, cutting and division. Today I am talking about cutting because that is the method I use. Most plants can all be started by all 3 methods. For herbs in this case the quickest way to get more plants is by stem cutting.


Where and How To Cut:
Start your cuttings when your plants are well established, mid summer-fall. On an herb stem there is a softwood and a hardwood part of a stem, the softwood is the new growth of the plant, the softwood is lighter in color and more flexible, and this softwood part you want to use, it will root out quicker which means (the roots grow quickly then the hardwood part of the stem).
Cut the stems at the node, (right under where the leaves join the stem). Cut at least 4-6 inches of stem and take off the leaves 2 inches from the bottom. This is where your new roots will emerge.

Place the stems into a mason jar or a glass on a windowsill and place room temperature water in the jar, making sure the bottom stems are covered. I place the water all the way up to where I cut the last few leaves of the plants, about 4 inches of water, just make sure all the stems are covered. Change the water every few days. You will see roots rather quickly about 2-3 weeks. When you see plenty of nice long roots you are ready to place into pots in your home. Basil and mint are very quick and root very easy.

What to do next:

Get yourself several pots and potting soil, after you notice all of your cuttings have plenty of roots, plant them and store them on a table, end table, somewhere in your home where you are going to have sun in the winter months.


Monday, August 1, 2016

Creamy Tortellini With Sun Dried Tomato,Spinach, And Mozzarella


This tortellini with sun dried tomatoes, spinach, mozzarella, and fresh basil are so delicious together and the creamy sauce is just perfect, so many great flavors and everyone loved it, no need to go to any fancy restaurants when you have this meal, my family said WOW..so I knew it was a huge hit.
Very easy to make in less then 30 minutes you will impress everyone with this. This is so fresh tasting and a light meal, the sauce is not thick and heavy, just perfect. I saw this and I knew we would all love it. This recipe would even be great for a crowd if you are making large trays of hot dishes. try it you will make it over and over again just like we do..


Ingredients:
  • 1/2 heaping cup Julianne cut sun dried tomatoes in oil in a jar, If you cannot find the Julianne cut sun dried tomatoes then use what you can find and slice them
  • 2 tablespoons olive oil from sun-dried tomatoes
  • 5 garlic cloves, minced
  • 6 ounces bag fresh baby spinach 
  • 2 2/3 cups half and half
  • 1/2 teaspoon salt
  • 1/4 teaspoon paprika
  • 1 cup mozzarella cheese, shredded
  • 8 fresh basil leaves, chopped
  • 4 cups tortellini, uncooked 
  • 1/2 cup pasta water, optional: only use the pasta water if sauce looks a little dry, if you make earlier and have to reheat.  I added it in anyway
  • Parmesan Cheese for topping 

Directions:
              
  1. In a large skillet on medium heat add 2 Tablespoons of the sun-dried tomatoe oil and the sun dried tomatoes saute for about 1-2 minutes, then add garlic and saute for a minute or until fragrant. Add baby spinach and continue cooking and stirring on medium heat until spinach just starts to wilt. Add the half and half, salt, paprika and bring to boil, reduce heat to simmer and add the mozzarella cheese then stir until the mozzarella is melted and smooth, add 1/2 cup of pasta water then add chopped fresh basil.
  2. Cook tortellini according to package instructions. Drain, rinse pasta, add a drizzle of olive oil salt and pepper to taste.
  3. Add the cooked tortellini to the sauce, stir to coat and until warm. You can add more salt and pepper if needed at this point, 
  4. Serve warm and top with Parmesan cheese. 


Thursday, July 21, 2016

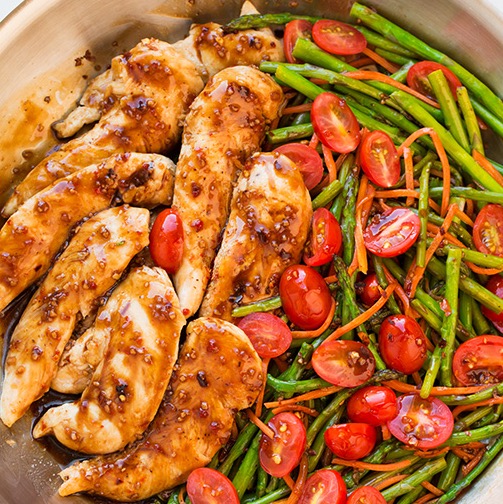
Balsamic Chicken With Asparagus And Tomatoes


Tender chicken coated in a delicious balsamic dressing with fresh asparagus, carrots and grape tomatoes is the perfect meal that comes together in less about 20 minutes. What doesn't taste good with balsamic dressing the tenderloin part of the chicken is my favorite part it takes on the dressing and is so good, also I always look for thin asparagus, trim off the tough ends, tomatoes here in Jersey now are so juicy and the best. Perfect meal for a crowd of just a quick dinner, I found this recipe a long time ago, make it a few different ways, with green beans, sometimes with just balsamic dressing only, but the best is this recipe I found, give it a try you will love it..


Ingredients
  • 1/2 cup Italian dressing
  • 5 Tablespoons balsamic vinegar
  • 3 Tablespoons honey
  • 1/8 teaspoon crushed red pepper flakes, or more to taste 
  • 3 pounds chicken breast tenderloins
  • 2 1/2 Tablespoons olive oil
  • Salt and freshly ground black pepper
  • 1-2 pounds fresh asparagus, trim of the ends, cut into 2-inch pieces 
  • 1 1/2 cups matchstick carrots
  • 1 pint container grape tomatoes, halved
Directions
  • 1. In a mixing bowl whisk together salad dressing, balsamic vinegar, honey and red pepper flakes, then set aside.
  • 2. In a large non stick skillet heat olive oil over medium-high heat. 
  • 3. Season chicken with salt and pepper then place chicken spread out into skillet. Cook about 6 - 7 minutes turning once halfway through cooking, until chicken has gotten a nice golden color and cooked through. 
  • 4. While your chicken is cooking chop asparagus and tomatoes, you can purchase the matchstick carrots in your food store, if you cannot find them buy a bag of carrots and cut them into matchstick pieces.
  • 4.  After the chicken is done cooking add half the dressing mixture to skillet and coat chicken, then transfer chicken to a large plate, while leaving sauce in skillet. Add the asparagus and carrots to skillet, stirring frequently, until crisp but yet tender, about 4 minutes. Now transfer the veggies to plate with chicken. 
  • 5. Add remaining dressing mixture to skillet and cook and stir until thickened, about 1-2 minutes. Return the chicken and veggies back into the skillet, add the tomatoes, stir to coat, and serve warm with rice on the side.


  • Recipe and photo source adapted from: http://www.cookingclassy.com/2015/02/one-pan-balsamic-chicken-veggies/adapted from BHG

Tuesday, July 19, 2016

Hamburger Pie Stuffed Potatoes


These potatoes are cooked perfectly then stuffed with the mixture of meat, sauce, onions and veggies topped with melted cheddar cheese. I love hamburger pie ( Shepard's Pie) we grew up eating this dish, but we had it in the layered casserole, I will post the recipe for that also, which is so easy and my all time favorite.
Can't go wrong with these it will please everyone, you have your meat, sauce, and veggies all packed into this potatoes. We have all once in our lives had a hamburger or Shepards pie.  Have some salad on the side and everyone will enjoy these. I saw this recipe and knew I would like it, but I made the changes as to how I make my casserole and just stuffed my mixture into these potatoes.


Ingredients:


  • 4-6 baking potatoes
  • 1 pound lean ground beef
  • 1 medium onion, chopped 
  • 2 cups homemade pasta sauce, or 1 jar sauce 
  • 2 cups frozen mixed vegetables, thawed and drained, or you can use frozen corn 
  • 1-2 cups shredded cheddar cheese 


  • Directions:

    1. Clean and pierce the potatoes first then bake potatoes in a 400°F oven for about an hour or until cooked. ( If desired I place my potatoes into foil, pierce them and drizzle a little olive oil, salt and pepper and bake for about an hour) 

    2. While the potatoes are cooking, heat a skillet over medium heat, add the ground beef, onion, and a pinch of salt and pepper. Cook, breaking up the meat, until it is browned. Drain any fat left. Add meat with onions back to large skillet add the tomato sauce and veggies stir, until warm and until mixture thickens. 

    3. Cut a slit down the length of the potatoes.  Squeeze the sides of the potato to open it up more and place the potatoes in a 13x9 inch glass baking dish. 

    4. Spoon the filling into the potatoes and top with as much shredded cheesecake you desire.

    5. Place the dish under the broiler for 2 or 3 minutes, or back into the oven until cheese is melted and browned.

    Wednesday, July 13, 2016

    Cheese Steak Zucchini Boats


    These healthy yet filled with tender roast beef, caramelized onions, peppers, and mushrooms. After roasting these zucchini boats you fill them with this mixture and top with melted provolone cheese.
    Your gardens are now filled with zucchini like mine, perfect meal for your family, my husband loves meat and potatoes and I love veggies so now they meet and come together to make everyone happy. You can get your cheese nice and dark and place under the broiler for a few minutes to get that great depth of color.


    Ingredients:
    • 4 medium/large wide zucchini
    • 4 Tablespoons olive oil, divided
    • 1 large yellow onion, sliced 
    • 10 button mushrooms, sliced 
    • 1 large red bell pepper, Sliced, any color pepper you can use
    • 1 pound sliced thin roast beef, from the deli, cut into pieces on the small side
    • Salt and freshly ground black pepper
    • 1-2 Tablespoon beef broth, or you can use water
    • 2 cups shredded provolone cheese
    • Fresh parsley if desired for garnish


    Directions:

    • 1. Preheat oven to 400 degrees. 
    • 2. Using a spoon, scoop centers from zucchini to make boats leave 1/4-inch rim.  Brush both sides of zucchini with 1 Tablespoon of the olive oil and season lightly with salt and pepper. Place into 2 baking dishes. Bake in preheated oven 20 - 25 minutes until or until near tender.
    • 3. While the zucchini is baking place a large skillet over medium-high heat. Add 3 Tablespoons olive and add the onion and saute for about 5 minutes, then add the mushrooms and saute about 5 minutes longer.  add bell pepper and garlic and saute until tender, about 3-4 minutes. Then add in roast beef, season with salt and pepper to taste then stir in the broth and cook until warmed, about 30 seconds.
    • 4. Remove the roasted zucchini from the oven and fill with roast beef mixture. Sprinkle top with cheese. Return to oven and bake about 5-8 minutes longer, or until cheese has melted, after the cheese has melted you can place under broiler for 1-2 minutes to get a nice golden brown dark cheese. If desired garnish with parsley. 
    • 5. You can pick them up with hands and eat or use a knife.


    Tuesday, July 12, 2016

    Brownie Marshmallow Crunch Frosted Bars


    These layered yummy brownie bars are topped off with a creamy marshmallow fluffy frosting then a crunchy chocolate peanut butter to top these delicious bars. When I tell you this is top 10 of my favorite recipes, you have to make these. As you take your first bite you get a perfectly cooked brownie then a layer of creamy frosting and topped off with a gooey crunch.
    I love looking and trying bar recipes, this recipe is so easy, your kids can help with this one, if you need a quick delicious recipe to bring for parties, home, or for any occasion this is perfect.
    My sister found this recipe and made for my niece and nephews party and these were such a huge hit, I had to make more the next day for my family. And again gone. All I can say for this recipe is wow, Valerie you came up with a great recipe that I will keep forever.


    Ingredients:

    1 box Pillsbury brownie mix
    2/3 cups vegetable or canola oil
    1/4 cup water
    2 eggs
    1 container Pillsbury Vanilla Marshmallow fluffy frosting
    2 cups semi sweet chocolate chips
    1 cup peanut butter, smooth
    1 Tablespoon butter, salted
    1 1/2 cups Krispy Rice cereal


    Directions:

    1. Follow the brownie package directions and combine brownie mix with the oil, eggs and water, whisk and stir until combined.
    2. Bake in a 13" x 9" pan follow the baking instructions on the box. Remove from oven and cool completely.


    1. 3. Top brownie layer with the frosting by smoothing it out with a spatula or knife until completely covered.
    2. 4. For the topping, in a saucepan combine the chocolate chips, peanut butter and butter. On low heat cook and stir until chocolate chips have completely melted and mixture is well combined. 
    3. 5. Remove from the heat and immediately stir in crisp rice cereal. Then again immediately with a spoon or spatula place the mixture over the top of the frosting layer and spread gently over the entire pan. Chill until completely set.
    4. 6. Allow to sit out for 10-15 minutes before slicing. Store at room temperature or refrigerator.


    5. Recipe and photo source from: http://www.fromvalerieskitchen.com/2016/01/brownie-marshmallow-crunch-bars/ Adapted from Taste of Home